
Introduction
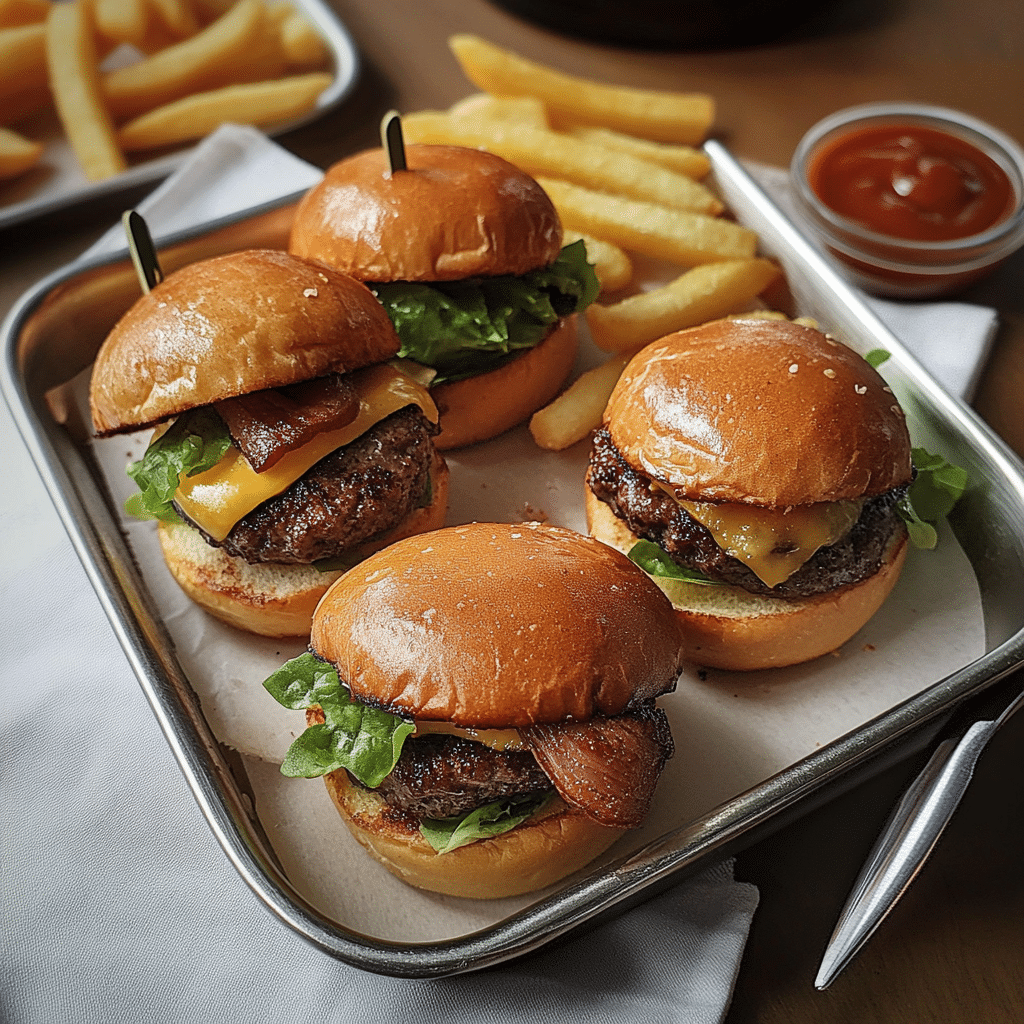
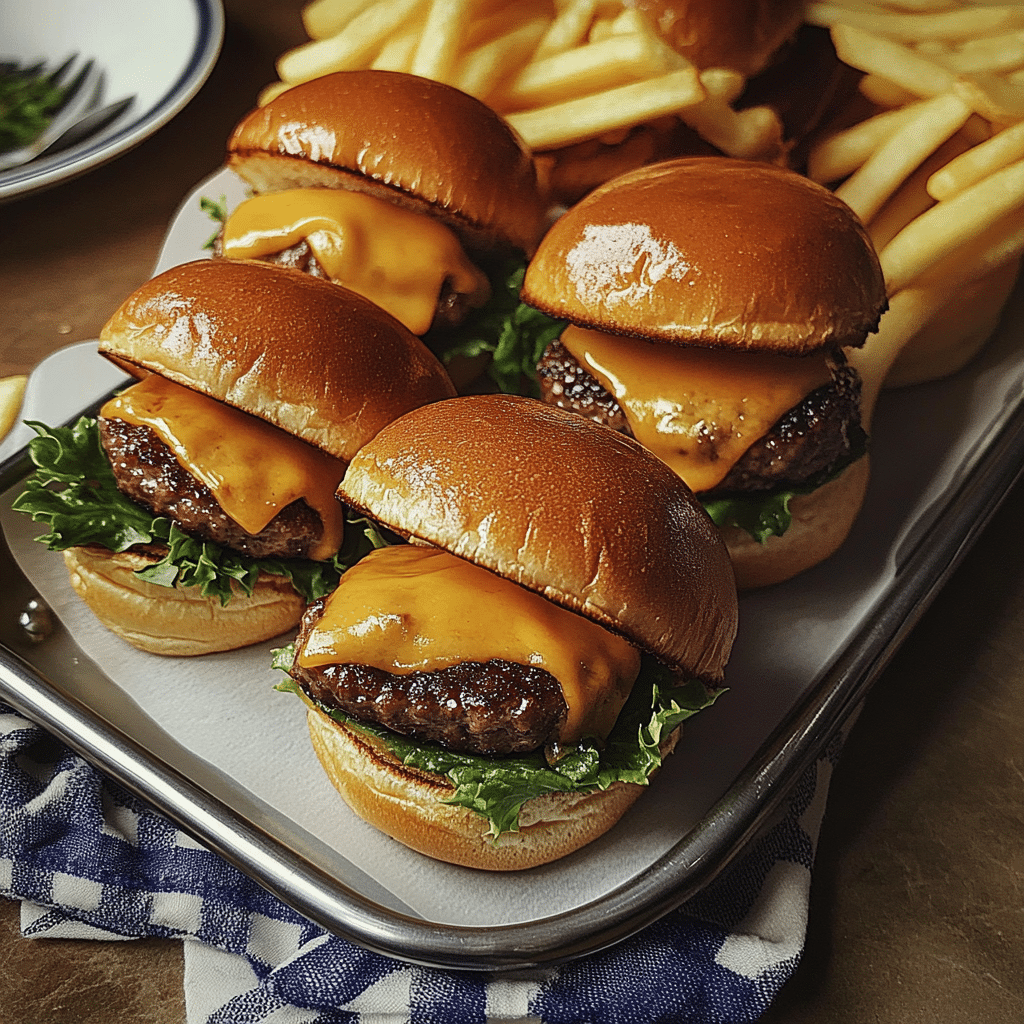
Mini Cheeseburger Sliders are a fun, bite-sized take on the classic cheeseburger, perfect for parties, game day, or casual gatherings. These sliders feature juicy, seasoned beef patties topped with melted cheese, nestled inside soft, buttery slider buns. With all the flavors of a traditional cheeseburger, these sliders are the ultimate crowd-pleaser.
I first made these sliders when I wanted to serve something that was both fun and satisfying for a gathering, and they quickly became a favorite. The combination of tender beef and melty cheese inside the soft buns makes each bite irresistible. You can easily customize them with pickles, onions, or even a dollop of ketchup and mustard, just like the classic version.
Whether served as a snack or a meal, these Mini Cheeseburger Sliders are sure to be a hit with both kids and adults alike. Their bite-sized nature makes them perfect for sharing, and their simple yet delicious flavor will keep everyone coming back for more.
Perfect for:
- Game day
- Party appetizers
- BBQs
- Family gatherings
- Casual dinners
Why You’ll Love This Mini Cheeseburger Sliders
Here’s why Mini Cheeseburger Sliders will become your go-to appetizer:
- Bite-Sized and Flavorful: These sliders pack all the savory goodness of a full-sized cheeseburger into a compact, easy-to-eat package.
- Customizable Toppings: You can load them up with all your favorite burger toppings like lettuce, tomatoes, pickles, and condiments.
- Quick and Easy: With simple ingredients and quick cooking time, these sliders are a breeze to make, even for beginners.
- Great for Feeding a Crowd: Their mini size makes them perfect for feeding a large group of people at parties or gatherings.
- Versatile: These sliders can be made with beef, chicken, or even vegetarian patties, allowing you to cater to different preferences.
Preparation and Cooking Time
- Total Time: 30 minutes
- Preparation Time: 10 minutes
- Cooking Time: 15-20 minutes
- Servings: 12 sliders
- Calories per serving: Approximately 250-300 calories (depending on toppings)
- Key Nutrients: Protein: 12g, Carbs: 22g, Fat: 14g
Ingredients
Gather these ingredients to make your Mini Cheeseburger Sliders:
- 1 lb ground beef (80% lean)
- 12 slider buns
- 6 slices of cheddar cheese (cut in half)
- 1 tablespoon olive oil
- 1 tablespoon Worcestershire sauce
- Salt and pepper, to taste
- 1 tablespoon Dijon mustard (optional)
- 1 tablespoon ketchup (optional)
- 1 small onion, finely chopped (optional)
- Lettuce, tomato, pickles, and any other toppings you like
Ingredient Highlights
- Ground Beef: Choose 80% lean ground beef for a juicy, flavorful patty with the right balance of fat.
- Cheddar Cheese: Classic cheddar cheese melts perfectly on top of the beef patty, adding a rich and savory flavor.
- Slider Buns: Soft, small buns are perfect for holding the mini patties and absorbing the juices.
- Worcestershire Sauce: Adds a depth of flavor to the beef patties, making them extra savory.
- Toppings: Feel free to customize your sliders with your favorite toppings like onions, lettuce, tomatoes, pickles, and sauces.
Step-by-Step Instructions
Here’s how to make Mini Cheeseburger Sliders:
Prepare the Patties:
- Preheat the Oven: Preheat your oven to 350°F (175°C). Line a baking sheet with parchment paper or use a non-stick baking mat.
- Season the Beef: In a large bowl, mix the ground beef with Worcestershire sauce, salt, and pepper. Divide the mixture into 12 equal portions and shape them into small patties, slightly smaller than the slider buns.
- Cook the Patties: Heat the olive oil in a large skillet over medium-high heat. Cook the patties for 3-4 minutes per side, until they are browned and cooked through. You can also cook them on a grill for extra flavor.
- Add the Cheese: Place half a slice of cheddar cheese on each patty in the last minute of cooking, allowing it to melt over the top.
Assemble the Sliders:
- Toast the Buns: While the patties cook, slice the slider buns in half. You can toast them lightly on the skillet or in the oven for a minute to make them crisp and golden.
- Assemble the Sliders: Place a cooked patty on each bottom bun. Top with your favorite condiments (mustard, ketchup) and fresh toppings like lettuce, tomato, and pickles. Add the top buns to complete the sliders.
- Serve: Arrange the sliders on a serving platter and serve immediately while warm.
How to Serve Mini Cheeseburger Sliders
Mini Cheeseburger Sliders are versatile and can be served in many ways:
- At Parties: These sliders are perfect for serving at parties or gatherings, offering a bite-sized version of a classic favorite.
- With Sides: Serve these sliders with fries, chips, or a side salad for a complete meal.
- As an Appetizer: Serve a platter of sliders as an appetizer for a fun, finger-food experience.
- With Dipping Sauces: Provide a variety of dipping sauces like BBQ sauce, ranch, or spicy mayo for an extra layer of flavor.
Additional Tips for Mini Cheeseburger Sliders
Here are some tips to ensure your Mini Cheeseburger Sliders are perfect every time:
- Don’t Overwork the Beef: When forming the patties, avoid overworking the beef to keep the sliders tender.
- Use a Griddle or Grill: For extra flavor, you can cook the patties on a griddle or grill instead of a skillet.
- Customize the Toppings: Feel free to experiment with different toppings, like sautéed mushrooms, bacon, or even a fried egg, for a unique twist.
- Keep the Patties Small: Make sure the patties are slightly smaller than the buns, as they will shrink a bit during cooking.
Recipe Variations for Mini Cheeseburger Sliders
Here are 10 variations you can try for Mini Cheeseburger Sliders:
- Bacon Cheeseburger Sliders: Add crispy bacon strips on top of the patty for a smoky, savory flavor.
- Chicken Sliders: Replace the beef with ground chicken or turkey for a lighter slider option.
- Veggie Sliders: Make vegetarian sliders using plant-based patties or black bean burgers.
- BBQ Sliders: Add a tablespoon of BBQ sauce to the beef mixture and top with coleslaw for a BBQ-inspired slider.
- Spicy Sliders: Add sliced jalapeños or spicy pepper jack cheese to the patty for an extra kick.
- Mushroom Swiss Sliders: Top the beef patties with sautéed mushrooms and Swiss cheese for a delicious combination.
- Hawaiian Sliders: Add a slice of grilled pineapple and a teriyaki glaze for a sweet and savory flavor.
- Cheeseburger Sliders with Fried Onion Rings: Top the patties with crispy fried onion rings for added crunch.
- Slider Sliders: Use mini slider buns for an even smaller version of these bite-sized treats.
- Cheeseburger Sliders with Avocado: Add a few slices of fresh avocado to each slider for extra creaminess.
Freezing and Storage for Mini Cheeseburger Sliders
- Freezing: You can freeze the cooked sliders (without buns) for up to 3 months. Wrap them individually in plastic wrap and store in a zip-top bag. Thaw in the refrigerator before reheating.
- Storage: Store leftover sliders in an airtight container in the refrigerator for up to 2-3 days. Reheat them in the oven or microwave before serving.
Special Equipment for Mini Cheeseburger Sliders
Here are some special equipment items to make preparing your Mini Cheeseburger Sliders easier:
- Griddle or Grill: For extra flavor, a griddle or grill will help you cook the patties with a nice sear.
- Slider Buns: Use small slider buns to hold the mini patties. You can find them in most grocery stores.
- Skillet or Nonstick Pan: A skillet or nonstick pan will make cooking the patties easier and prevent sticking.
- Measuring Spoons: Use measuring spoons for accurate seasoning and condiment portions.
- Serving Platter: A platter will help present the sliders in an attractive way for serving.
Frequently Asked Questions for Mini Cheeseburger Sliders
- Can I make these sliders ahead of time?
Yes, you can prepare the patties and cook them ahead of time. Store the cooked patties in the refrigerator for up to 2-3 days, then assemble and serve when ready. - Can I make these sliders with chicken or turkey?
Yes, you can substitute the ground beef with ground chicken or turkey for a lighter option. Be sure to season well, as chicken and turkey can be more mild in flavor. - How do I prevent the sliders from becoming dry?
Use ground beef with a bit of fat (80/20 blend) to keep the sliders juicy. Don’t overcook them, and add condiments like mustard or ketchup to keep them moist. - Can I make the sliders gluten-free?
Yes, use gluten-free slider buns and check that your condiments are gluten-free to make these sliders gluten-free.
Mini Cheeseburger Sliders

Mini Cheeseburger Sliders are a fun, bite-sized take on the classic cheeseburger, perfect for parties, game day, or casual gatherings. These sliders feature juicy, seasoned beef patties topped with melted cheese, nestled inside soft, buttery slider buns. With all the flavors of a traditional cheeseburger, these sliders are the ultimate crowd-pleaser. Whether served as a snack or a meal, they’re sure to be a hit with both kids and adults alike.
- Prep Time: 10 minutes
- Cook Time: 15-20 minutes
- Total Time: 30 minutes
- Yield: 12 servings 1x
Ingredients
- 1 lb ground beef (80% lean)
- 12 slider buns
- 6 slices of cheddar cheese (cut in half)
- 1 tablespoon olive oil
- 1 tablespoon Worcestershire sauce
- Salt and pepper, to taste
- 1 tablespoon Dijon mustard (optional)
- 1 tablespoon ketchup (optional)
- 1 small onion, finely chopped (optional)
- Lettuce, tomato, pickles, and any other toppings you like
Ingredient Highlights
- Ground Beef: Choose 80% lean ground beef for a juicy, flavorful patty with the right balance of fat.
- Cheddar Cheese: Classic cheddar cheese melts perfectly on top of the beef patty, adding a rich and savory flavor.
- Slider Buns: Soft, small buns are perfect for holding the mini patties and absorbing the juices.
- Worcestershire Sauce: Adds a depth of flavor to the beef patties, making them extra savory.
- Toppings: Feel free to customize your sliders with your favorite toppings like onions, lettuce, tomatoes, pickles, and sauces.
Instructions
Prepare the Patties:
- Preheat the Oven: Preheat your oven to 350°F (175°C). Line a baking sheet with parchment paper or use a non-stick baking mat.
- Season the Beef: In a large bowl, mix the ground beef with Worcestershire sauce, salt, and pepper. Divide the mixture into 12 equal portions and shape them into small patties, slightly smaller than the slider buns.
- Cook the Patties: Heat the olive oil in a large skillet over medium-high heat. Cook the patties for 3-4 minutes per side, until they are browned and cooked through. You can also cook them on a grill for extra flavor.
- Add the Cheese: Place half a slice of cheddar cheese on each patty in the last minute of cooking, allowing it to melt over the top.
Assemble the Sliders:
- Toast the Buns: While the patties cook, slice the slider buns in half. You can toast them lightly on the skillet or in the oven for a minute to make them crisp and golden.
- Assemble the Sliders: Place a cooked patty on each bottom bun. Top with your favorite condiments (mustard, ketchup) and fresh toppings like lettuce, tomato, and pickles. Add the top buns to complete the sliders.
- Serve: Arrange the sliders on a serving platter and serve immediately while warm.
Nutrition
- Calories: 250-300 kcal
- Fat: 14g
- Carbohydrates: 22g
- Protein: 12g
Conclusion
Mini Cheeseburger Sliders are the perfect bite-sized treat for any occasion. They combine all the flavors of a classic cheeseburger with the fun of a mini-sized, portable snack. Whether you’re hosting a party, enjoying a family gathering, or just looking for a quick meal, these sliders will satisfy your cravings and impress your guests. Customize them with your favorite toppings, and enjoy the simplicity and deliciousness of these crowd-pleasers.
This recipe is as easy to make as it is tasty, making it ideal for casual get-togethers or busy weeknights. Whether you’re serving them at a big event or whipping them up for a family dinner, these sliders will quickly become a favorite on your menu.
I’d love to see how your Mini Cheeseburger Sliders turn out! Snap a photo, share it on social media, and don’t forget to tag me—I can’t wait to see your delicious creations. Happy cooking!